hexo的最佳撰寫環境 Hexo+Typora+Github+jsDelivr
為啥會有這篇?
因為,初期在創作Blog時,踩了很多的坑…
最棘手的問題..大概就是…怎麼方便的把文字跟圖片放在一起…
部屬Blog到Vercel/Github Pages時,也不會碰到圖片失效的問題
又要白瞟jsDelivr CDN(省流量/速度快)
本篇是以 我的角度出發…
在最舒服+Cost Down的情況下,
因為我用的寫作環境是Typora
所以以下用Typora來介紹laaa
事前準備
- 一個可以被自己愛上的Hexo主題,與設定
- Typora
- Github帳號
- 懂一咪咪的Git
操作步驟
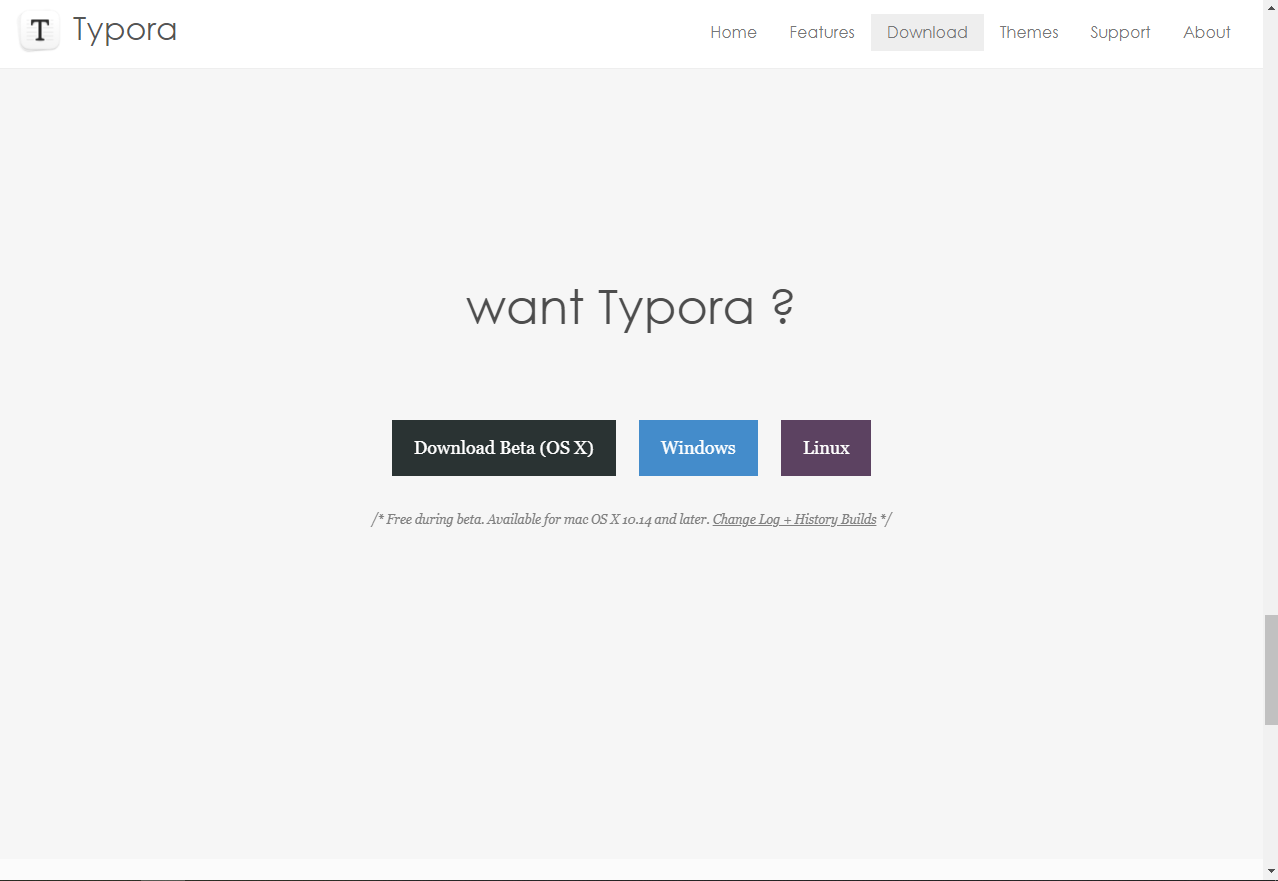
1. 下載Typora
首先,要先去下載Typora,Mac/Windows/Linux都能用啦
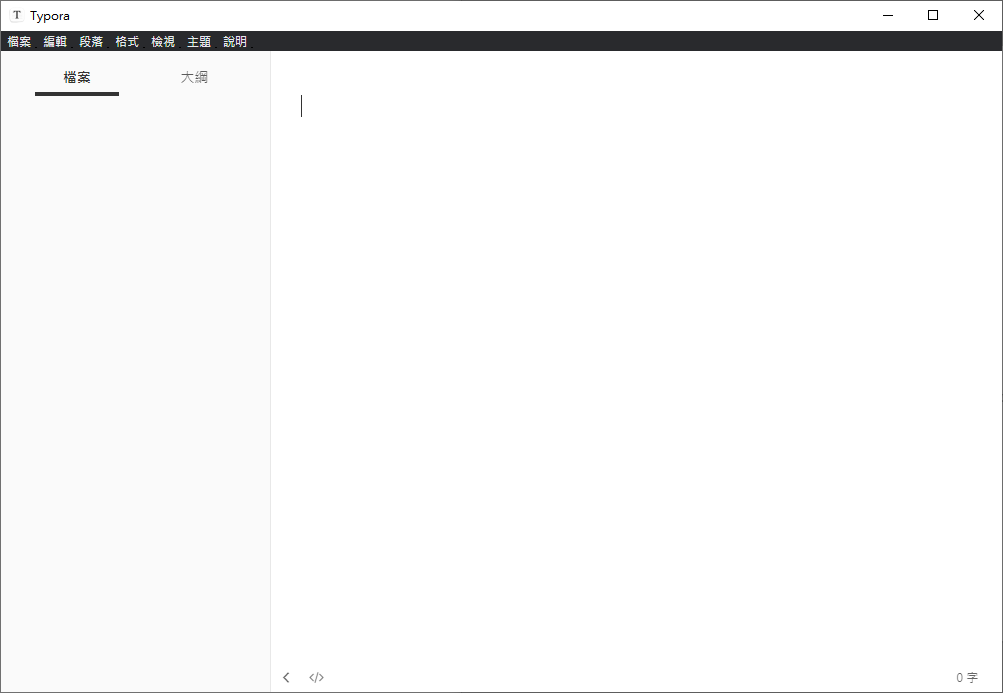
打開之後,會長這樣
2.Github帳號前置準備
1.生成Github Token
準備好之後
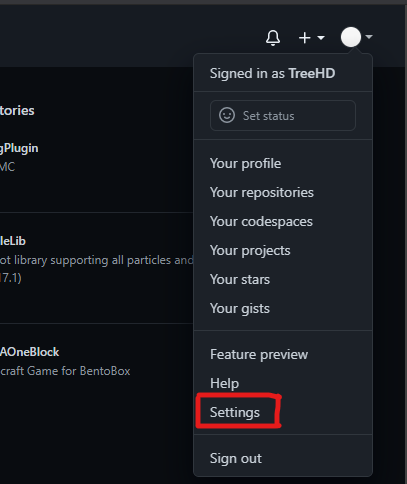
在右上角點擊你的頭像旁的箭頭 打開選單
找到Settings
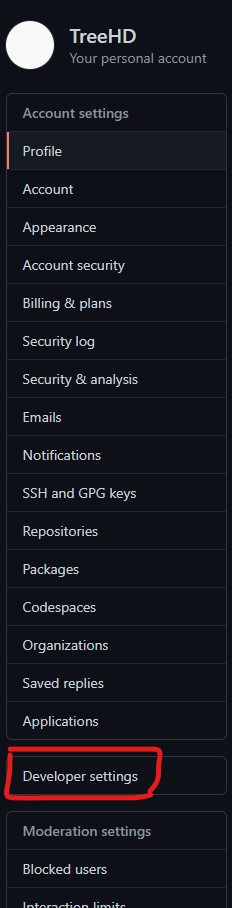
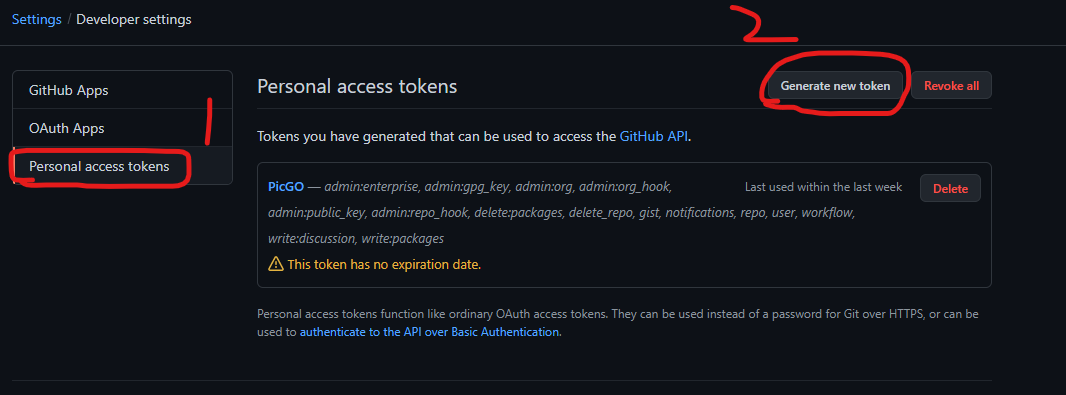
打開之後 點擊 Developer settings
後點選 Personal access tokens 並點 Generate new token
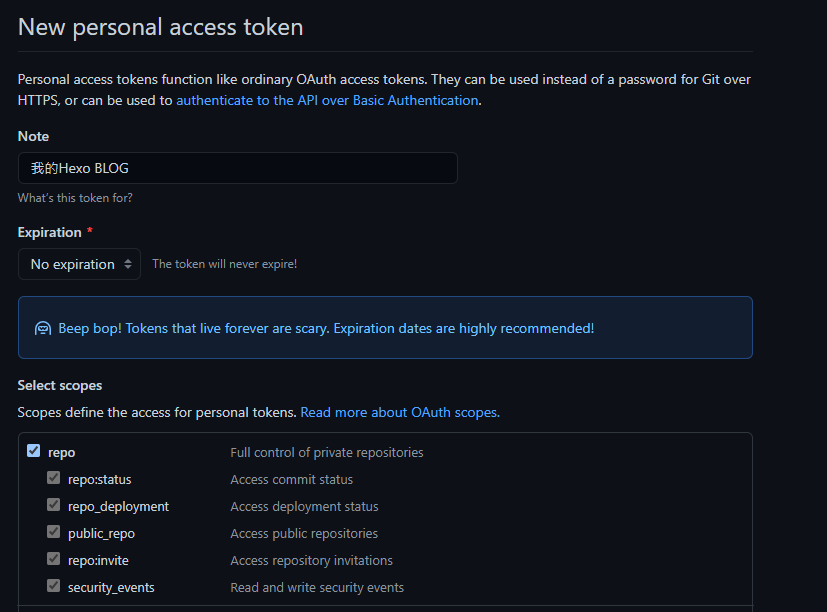
接下來設定Access Token的相關設定
Note: 可以隨意命名
Expiration: No expiration *建議啦 (不要外洩!!!!)
Select Scopes: 勾Repo就好
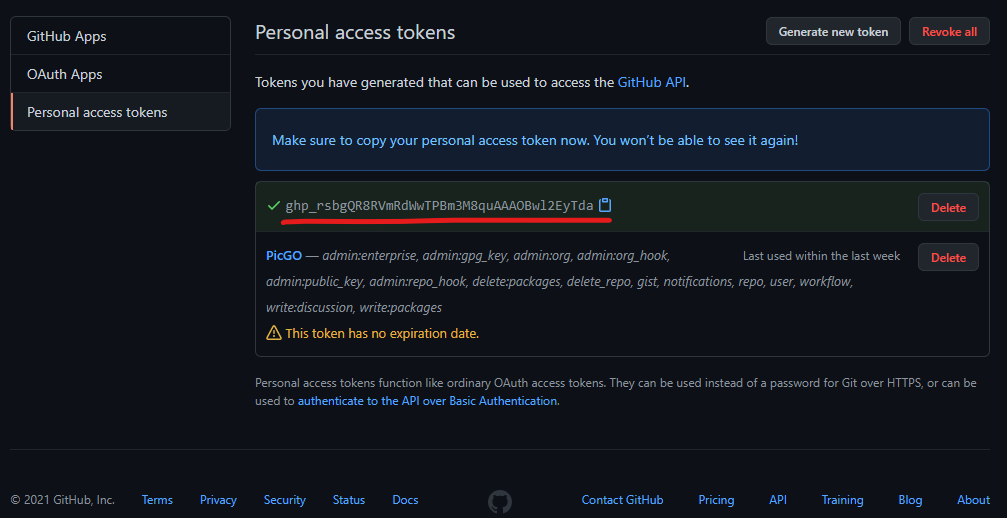
接著往下滑 點Generate Token
這組就會是你的Token了
不要外洩!!!
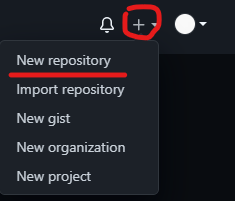
Github 創立一個新Repo
點擊你頭像旁的那顆**+**號
選擇New repository
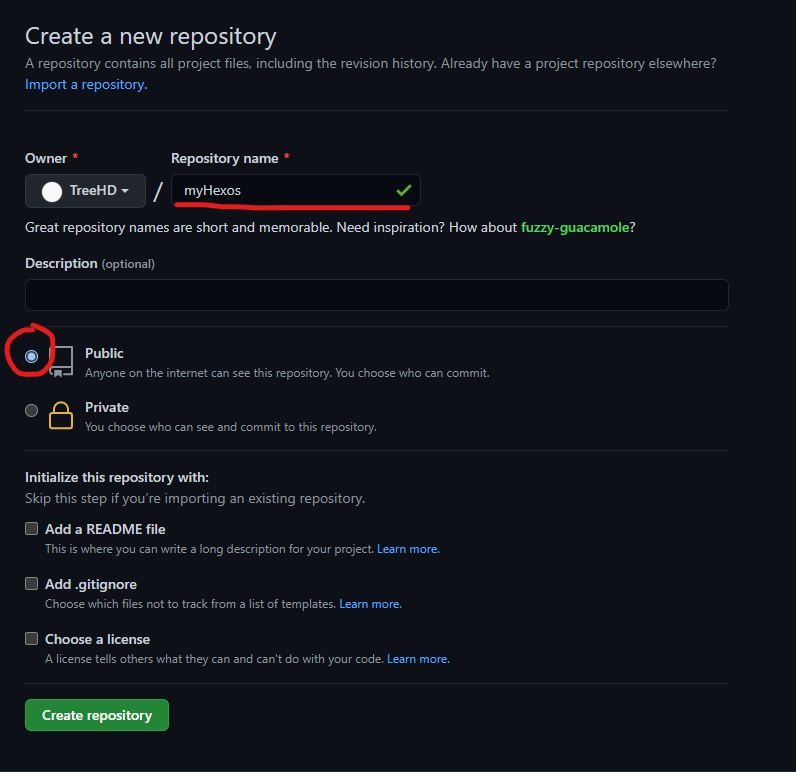
設定Repo相關訊息
Repository name: 自己取,只能是英文+數字
型別一定要選公開 不然jsDelivr會抓不到
最後點Create Repository
Typora設定
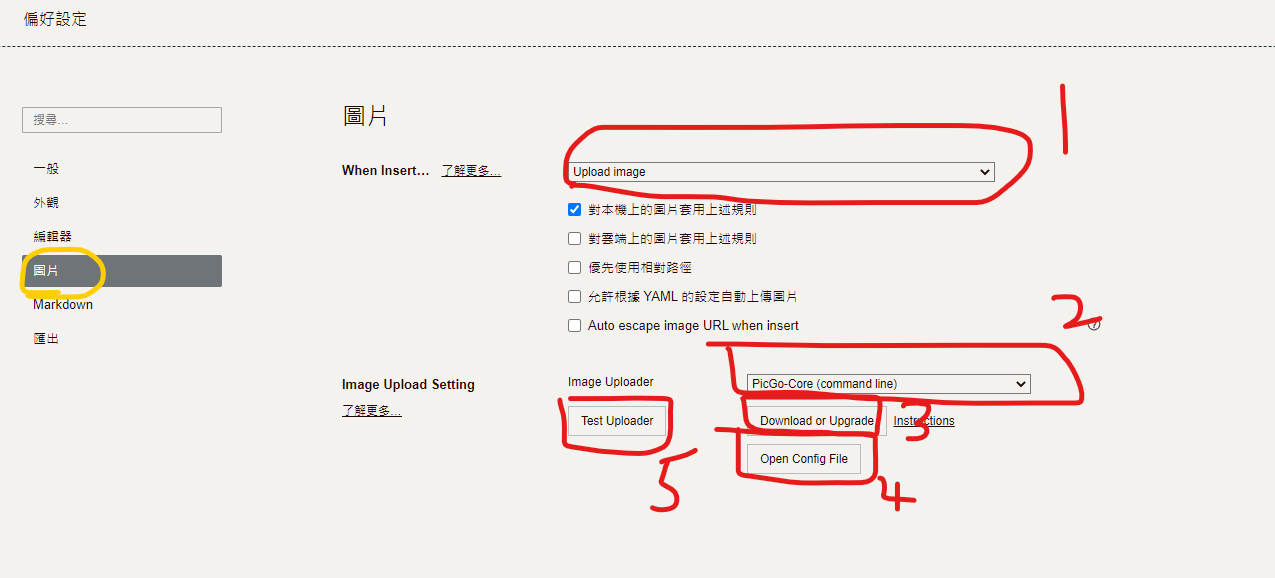
打開後,點擊檔案->偏好設定
圖片
依照圈起來的地方設定/點選
When Inset:
Uploaded imageImage Uploader:
PicGo-Core (command line)點選 Download or Upgrade
點選Open Config File
將下列Code Block 複製並貼上
並將 customUrl 的
TreeHD/myHexos以及repo 的
TreeHD/myHexos修改為自己的Github使用者名稱以及Repo
token 則修改為在上方申請的Github Token
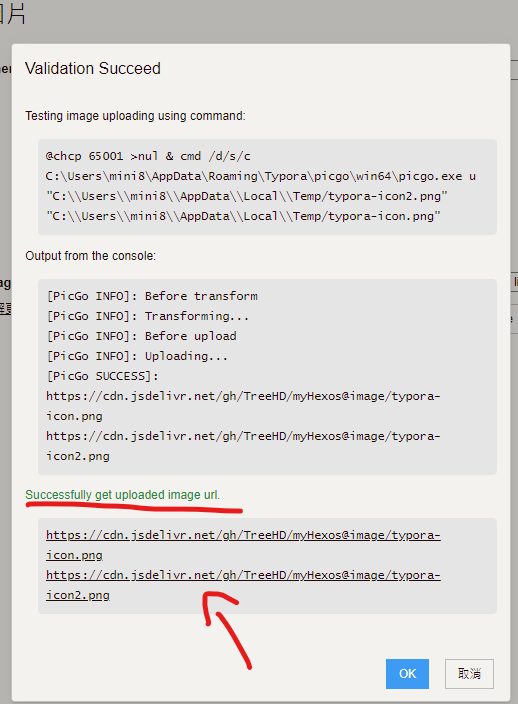
最後 點擊Test Uploader
1 | { |
出現Successfully 就成功啦
開始創作
直接將圖片在外面複製後(放到剪貼簿)
直接在Typora內貼上 就完成啦~
後話
這篇文章介紹的東西
大概是我這段時間..用的最順手的方式
前端也從原本放在我的OracleCloud小雞…移到了Vercel…
Vercel可以跟Github掛勾 把Repo的更新 馬上部屬到Vercel
圖片透過Github+jsDelivr分發
基本可以說..除了域名錢外..沒啥開銷了😆